As a follow up to my last post, I’ve decided to dig in a little more to some of the upcoming TC39 proposals. The proposal that we’re reviewing today provides a few new ways to work with Arrays in an immutable way – a proposal titled “Change Array by copy”.
As the title “Change Array by copy” suggests, the new methods covered by the proposal provide Array functions which allow working with arrays in an immutable fashion (with the assumed intent of reducing side effects often associated with mutable objects, which are capable of being directly changed).
Included under the proposal are:
Array.prototype.toSorted()
Array.prototype.toReversed()
Array.prototype.toSpliced()
Array.prototype.with()
You can check out the collaborative view of this proposal on GitHub.
Let’s dive in!
Similarly to Array.prototype.sort(), Array.prototype.toSorted() exposes a helper function capable of sorting members of an array sequentially. Unlike to Array.protptype.sort(), Array.prototype.toSorted() returns a new array, by copy, leaving the original array untouched. To see this in action, see the following example:
Array.prototype.sort() vs Array.prototype.toSorted() – As expected, arr1 is changed, while arr2 is not.
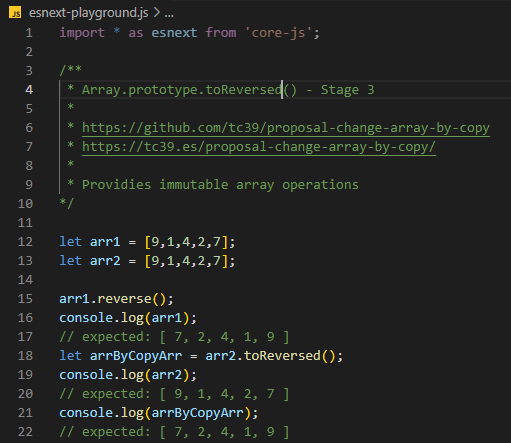
Up next, we have Array.prototype.toReversed() – essentially, the immutable form of Array.prototype.reverse(). Just as reverse() reverses the member order of the array, so to does toReversed() – but, again, without modifying the source array being operated on/against.
Array.prototype.reverse() vs Array.prototype.toReversed() – As expected, arr1 is changed, while arr2 is not.
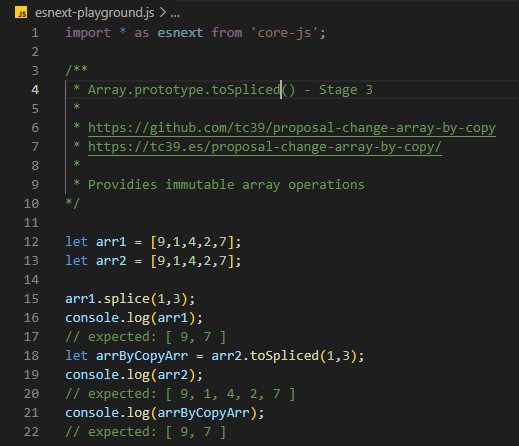
Last in our one-to-one function comparison is Array.prototype.toSpliced() – similar to the long standing and familiar Array.prototype.splice(), which is used to remove or replace elements within an array. As we can see in the following example, we’re capable of removing and replacing array elements with both splice() and toSpliced() – with the distinction that toSpliced() doesn’t modify the original array, and instead provides us a new, updated one via copy.
Array.prototype.splice() vs Array.prototype.toSpliced() – As expected, arr1 is changed, while arr2 is not.
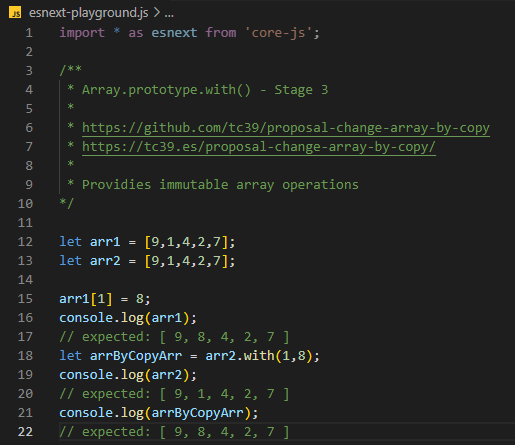
And finally, we have Array.prototype.with(). Unlike the previously discussed parts of the proposal, with() doesn’t really have a similarly named existing function – though we’re all likely familiar with the logic in play. When working with an array, it’s often common practice to reassign a value within an array by assigning a new value using the target’s zero-based index – with() exposes exactly this functionality, via a function call. See the following example to see Array.prototype.with() in play:
Array index-based assignment vs Array.prototype.with() – as expected, arr1 is changed, while arr2 is not.
As you may have noticed in the above (and in case you did not) we’re once again using the core-js library to play with these new, not-yet-spec, JavaScript proposals – so check it out, and perhaps give it a spin!
Anywhos… I’m really enjoying having the opportunity to look forward and actually play with new stuff in the works for JavaScript. Yay, funemployment! That said, if you or someone you know is seeking a developer with well over a decade of full stack experience, including large enterprise engineering and architecture, please do reach out via matt@immmatt.com or ping me on Twitter @mattezell!
Brought Array.prototype.group into my Nodejs module project via core-js (“import group from ‘core-js’;”)
Played with Tomorrow’s JavaScript today!
Still want to read more? Great!
I’ve been a JavaScript developer…well…for about as long as I’ve been a developer at all. That said, and admittedly a little embarrassingly, I’m far from an expert on the language – but I’m learning more everyday, including more about how little I know.
As if often the case with developers, you complete school and you quickly realize that you need a job. Armed with a bunch of CS theory, and what’s basically a beginners level of experience, you pick up new skills and tricks as you need them along the way – but rarely is there sufficient time to learn much else outside of this while maintaining balance in other parts of your life…
This is the process for years for many/most developers – you show up for work, you’re given a feature to implement, you encounter something you don’t know how to do, you do a little research, you try a few things until you find something that works, and then you move on – rarely thinking about it again. As the years go on, you keep doing that thing that you found that worked – but rarely do most of us dig in deeper to understand more or to find alternatives. Again, there’s unfortunately only so many hours in a day, week, month, year, and lifetime – and there’s a lot to living outside of punching a keyboard.
But I digress… I’m trying to be better – I’m trying to be proactive… I’m trying to dig deeper, to gain a greater understanding and to perhaps learn some alternative approaches to old problems along the way.
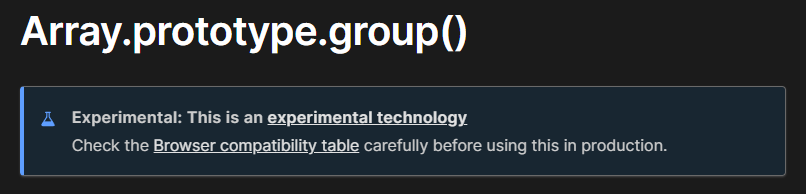
In my recent adventures of funemployment, I decided to play around more free-form in JavaScript… I find the MDN Web docs to be an excellent resource for JavaScript, which is where I began my journey of playing with experimental JavaScript features/proposals today. I figured “let’s get back to the basics” and take a look at the standard built-in objects, which is when I ran across the experimental proposal Array.prototype.group() – that cute little experimental beaker icon just screamed out to me.
We have an array of JSON objects named ‘inventory’ – with standardized properties associated with each contained object. As we can see, calling array.group() passing in ‘type’ as our associative element – conceptually, we can think of this as a category. As such, we can see the resulting output of our group() call is an object comprised of our ‘type categories’, which are arrays containing the matching type objects.
I thought this was pretty cool and useful, so I wanted to try it out… Naively, I thought “Nodejs always has bleeding edge stuff – so let’s just plop in our playground code…”.
D:\w\nodejs\csv.js:45
jsonArr.group((country => country));
        ^

TypeError: jsonArr.group is not a function
    at Object.<anonymous> (D:\w\nodejs\csv.js:45:9)
    at Module._compile (node:internal/modules/cjs/loader:1159:14)
    at Module._extensions..js (node:internal/modules/cjs/loader:1213:10)
    at Module.load (node:internal/modules/cjs/loader:1037:32)
    at Module._load (node:internal/modules/cjs/loader:878:12)
    at Function.executeUserEntryPoint [as runMain] (node:internal/modules/run_main:81:12)
    at node:internal/main/run_main_module:23:47

Node.js v18.12.1
Whelp… That’s not going to get it – Array.prototype.group() doesn’t exist… Why? Because it’s not part of JavaScript today – it’s a proposal for the future… Time to grow that brain! How might one, if so inclined, learn about these experimental JavaScript features and proposals?
It’s from the proposal that a whole new world of experimentation was shown to me… Down at the bottom of the proposal, I notice a link to an external polyfill library – ‘core-js‘… Wait… Does this mean I get to play with the future of JavaScript today?! Yup!
This is all new to me, so I figured I should just start throwing stuff at the wall to see what sticks… Up first, let’s just install…
npm install --save core-js
Now let’s figure out how to use this bad boy… Since I have my Nodejs project setup as a module, I figure I will just try to import group. Note: I’m not saying this is the best way to go about this, or anything of the sort – just sharing my process of discovery in case there’s interest.
import group from 'core-js';
So far, so good.
Now, consider my project… It’s a basic utility script – imports a CSV, and then coerces the CSV data into JSON array containing objects that represent said data…
Cool… I guess… I mean, just basic, boring CSV play… But group – yeah, Array.prototype.group() seems like it might be fun here… So, let’s try it out using country as a grouping element:
Will Array.prototype.group() become standard spec? I can’t say, but it looks promising… But I suppose what I wanted to share more than this cool new group proposal was how you and I can be a little more hands on with what’s potentially to come to the future of JavaScript by way of the handy-dandy core-js library!
I feel that it’s worth mentioning another interesting and useful resource I ran across while playing this morning… The unofficial ES Proposals site, which is a labor of love from Apple Software Engineer Saad Quadri. Check it out!
One of the first things one might notice is that the tutorial targets Angular 14 – but since I’m really wanting to get a jump on Angular 15, I figured I’d forge ahead and try to tackle whatever issues may arise as they arise.
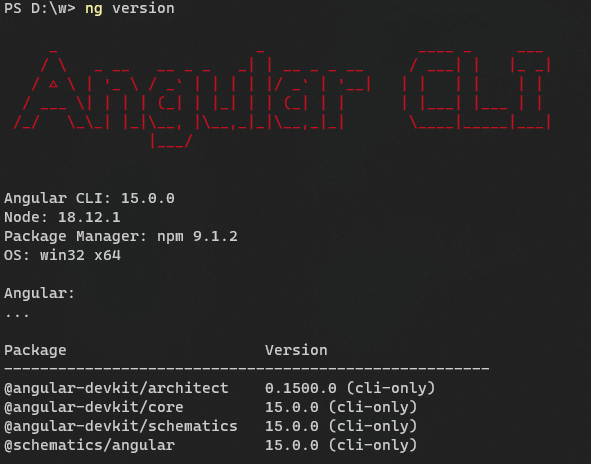
My environment
Since the tutorial largely just works in Angular 15, I’m not going to reproduce it step-by-step here – instead, I’m just going to highlight some of the issues I encountered when following along verbatim.
So, yeah… The tutorial mostly just translates to Angular 15, and most experienced Angular developers will be able to quickly workaround any issues that may arise from working through this Angular 14 tutorial in Angular 15… But if you’re curious about my journey, please feel free to continue on…
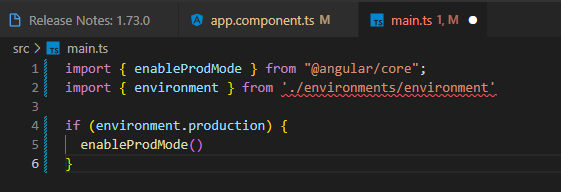
Hiccup #1 – in the ‘Create a new application’ section of the tutorial, we’re shown how to strip down our application in order to remove the ngModule (basically a cornerstone of ‘standalone components’) – and as part of those instructions, we’re shown how to enable production mode by leveraging the long familiar ./environments/environment.ts file… Okay… But I’m getting an error indicating this long standing file isn’t present in my project… odd… that fella is always hanging out there…
Can’t reference what doesn’t exist…
Since I can’t ever seem to just do what I set out to do, I must now satisfy my curiosity concerning why this file, which was previously generated as part of the new project, no longer exists… After a bit of poking around in the Angular CLI github repo, I see the following: https://github.com/angular/angular-cli/commit/283b564d1de985f0af8c2fcb6192801a90baacda
feat(@schematics/angular): remove environment files in new applications

This commit removes the usage of environment files and `fileReplacements` in new application projects. Previously, the environment files was used to distinguish between a prod build to invoke `enableProdMode`. The `enableProdMode` however needed only for the case of JIT mode in production mode, which is a rare case as JIT mode is recommanded to be used in production.

In the CLI, calling `enableProdMode` is not needed as `ngDevMode` it's set using the minifier.
Whelp… That settles that… Moving on…
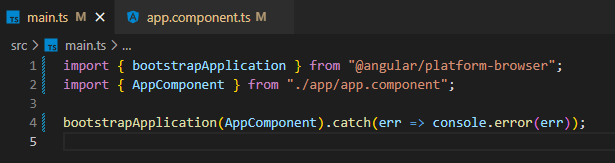
Since we no longer have this environment.ts file out of the box with new apps, it seems logical to assume we can skip some steps – basically, we just need to ensure we bootstrap our now-standalone AppComponent.
main.ts for Angular 15 Standalone Component
Skipping ahead to the next section, “Display the photos”, things seem straight forward enough… It’s worth noting that there seems to be a bit of a typo in the HTML, as the closing ‘article’ tag isn’t properly formed – no worries, as we just need to add an ‘>’ to make it valid.
Screenshot of tutorial showing ‘</article’ rather than ‘</article>’
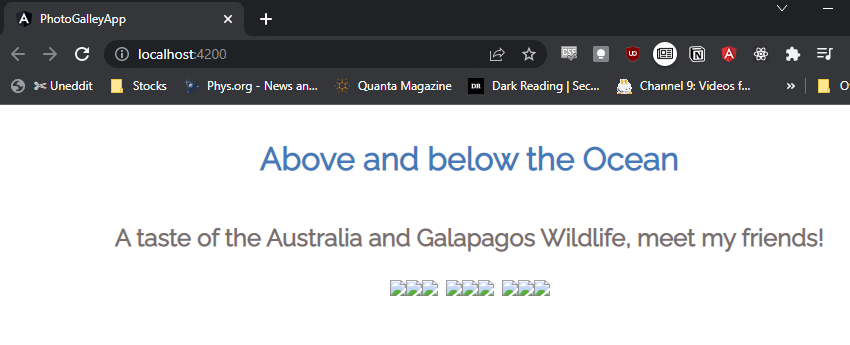
Upon saving and running our updated project, we will see that while things are technically working, they aren’t working great because we’re missing some assets – namely, the images…
Hmm.. That doesn’t look very nice…
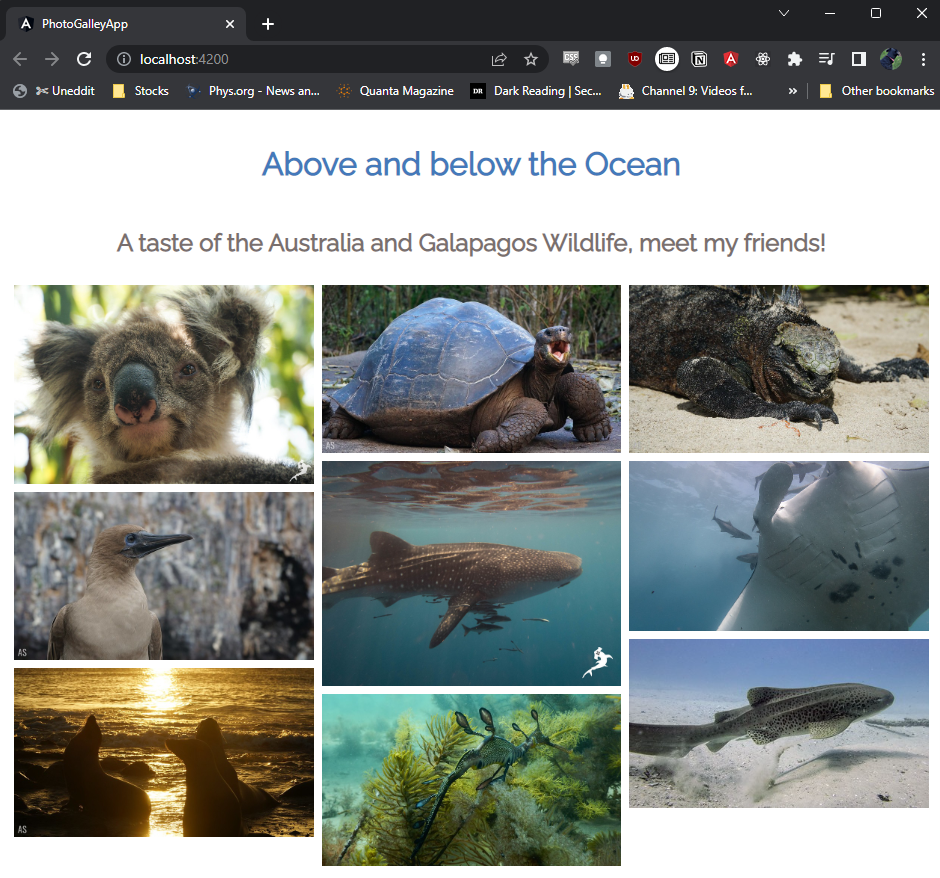
This makes sense, as image assets aren’t going to be generated by ‘ng new’ and are merely artifacts for this demo project… For simplicity, I’m just going to download these assets from the github project for this demo app: https://github.com/angular/codelabs/tree/standalone-components/src/assets
This looks better…
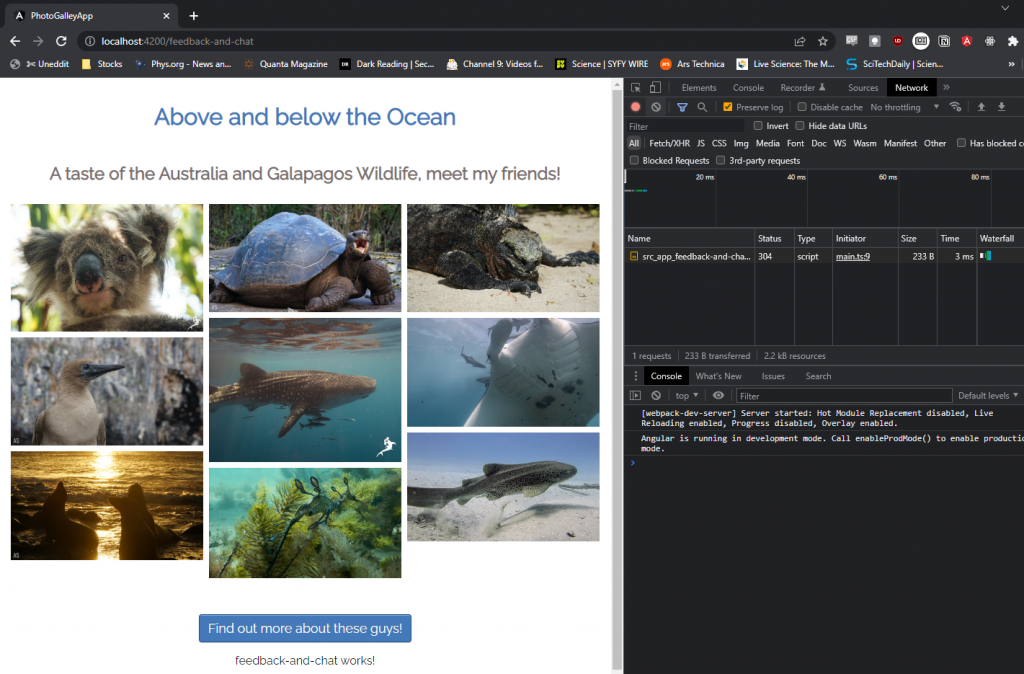
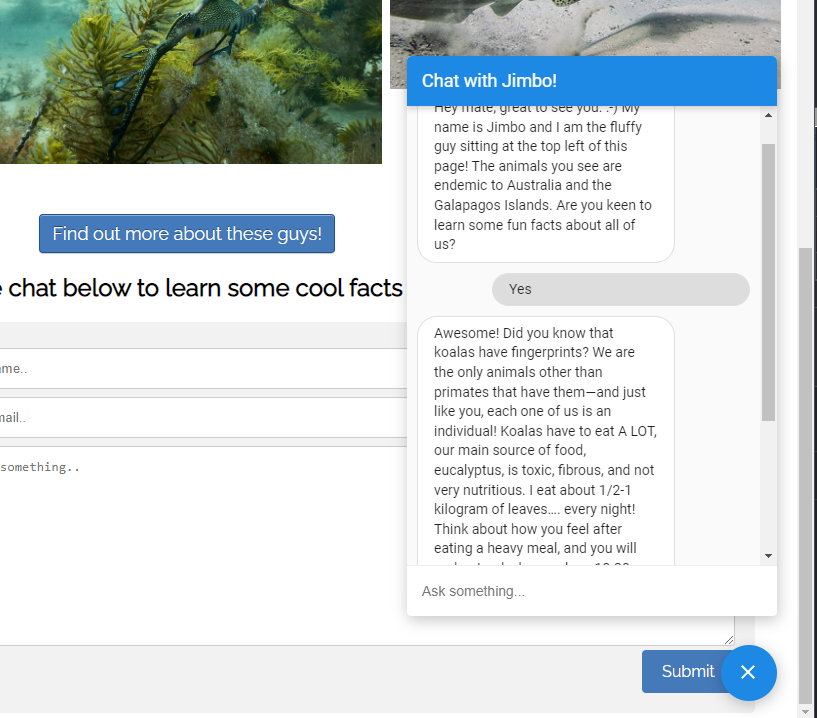
Continuing on to ‘Add a new standalone component’, everything in the original tutorial translates perfectly to Angular 15 and we can see our lazy loaded component as expected when we click the ‘Find out more about these guys!’ button as instructed:
Kewwwwl…
Another small note to make… Once you get to the ‘Add event handling to the form‘ section, step 4 of the ‘Add the send message form model to the component’ subsection instructs us to remove the default constructor:
Whelp… We don’t have a constructor in our newly created Angular 15 standalone component… Not particularly important, as it was empty and not really doing anything – but why doesn’t it exist?! MY ADHD WILL NOT ALLOW ME TO CONTINUE ON WITH WHAT I SET OUT TO DO UNTIL I KNOW… After a bit more poking around the Angular CLI repo, I see the following indicating that ngOnInit and the default constructor have been removed in Angular 15, as apparently users of these features generally prefer to simply add them manually: https://github.com/angular/angular-cli/commit/301b5669a724261d53444d5172334966903078c0
Moving on…
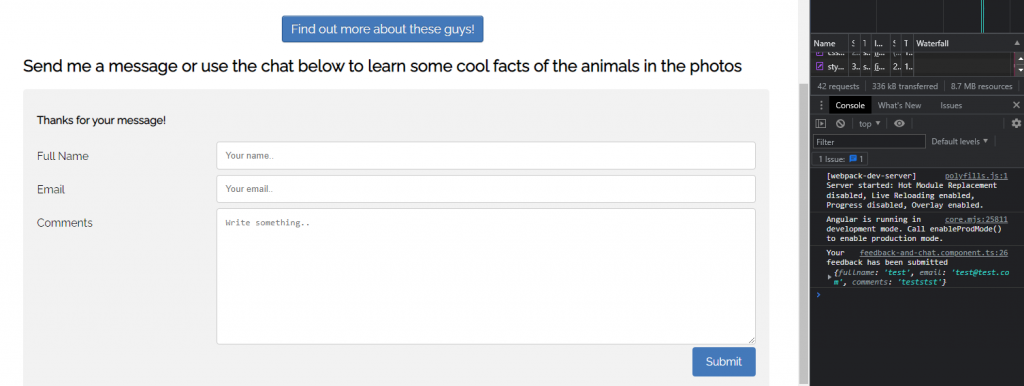
Reactive form up and running…
The next section, ‘Add a chat dialog’, just works. Unrelated note: I really liked this section… Having never played with a virtual agent / chat system, I learned something new, which is always fun! And that’s pretty much it – standalone components in Angular 15…
NEAT-O!
At this point, I’m going to stick a fork in this write up and consider it done. The remainder of the Angular Standalone Component tutorial details deploying the project to Google App Engine with Express.js – which I feel is a bit out of scope for this write up, which was to detail the hang ups I encountered working through this Angular 14 tutorial in Angular 15 (which were very minimal – YAY!).
With some of my newly found ‘free time’ while Funemployed, I really wanted to start playing around with some of the newer projects that I’ve simply not had the time or energy for.
At the top of this list has been Deno, the new-ish JavaScript, TypeScript and WebAssembly runtime based on V8, co-created by Ryan Dahl (Node.js creator).
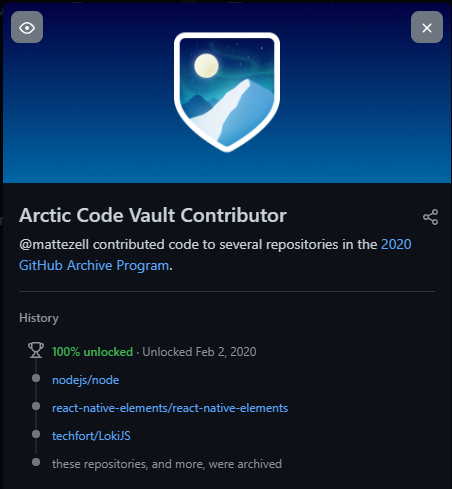
Why Deno? Well, for starters I love new and shiny things. But also, I have a special place in my heart for JavaScript runtimes – having been an early adopter of Node.js, at a time when serverside JavaScript was a controversial topic in the dev world (Thanks, Whiteboard IT! It’s because of my time with this company that I was exposed to a lot of really cool things, including Node.js and CouchDB/NoSQL). “How early?”, one might ask… Early enough that I’m listed as contributor #306 in the Node.js AUTHORS file – as a result of contributing a slash to the first official Windows installer.
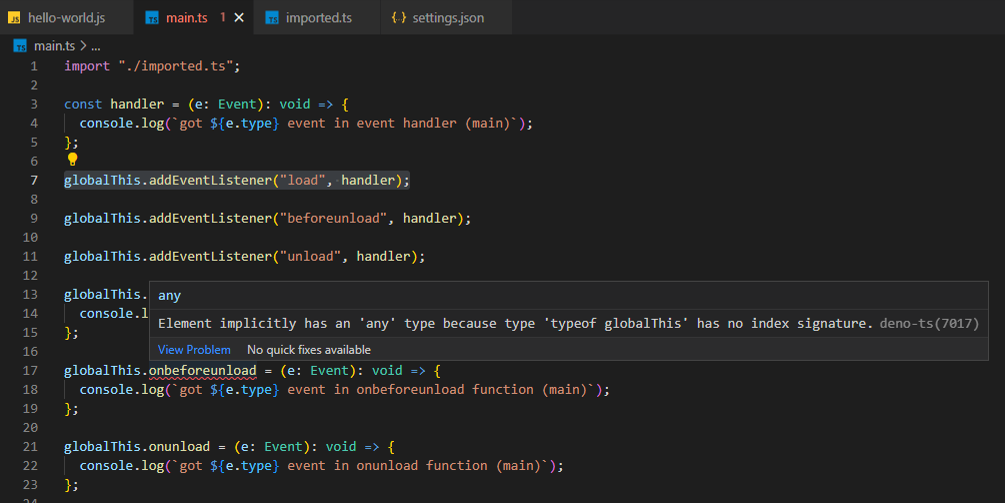
I began my journey with Deno as I normally do – essentially iterating on some basic Hello World types of projects to get familiar with the dev flow, tooling and capabilities. Pretty quickly, I encountered something in my codebase that confused me – a warning notifying me that the deno window typings didn’t have everything supported by window exposed. Surprisingly, it wasn’t just me randomly plugging in code that landed me here – it was in following along with the Deno lifecycle docs that brought me to this error.
“Element implicitly has an ‘any’ type because type ‘typeof globalThis’ has no index signature.deno-ts(7017)”
At this point in my journey, not only was I getting the warning in VSCode, but I was also unable to get beforeunload or onbeforeunload to fire… Hmm… So off to Google I go – which lead me to this thread discussing a related matter.
In digging a bit deeper, I came to realize that beforeunload/onbeforeunload weren’t firing due to my Deno version – with support for these not being added to window in Deno until v1.24.0 (and me currently running v1.23.0). “Alright”, I thought – “I just need to upgrade and this will all be solved.”
Sure enough, once on 1.24.0 I was able to play with beforeunload/onbeforeunload – but the “Element implicitly has an ‘any’ type because type ‘typeof globalThis’ has no index signature.deno-ts(7017)” warning remained…
Having wished I had more time to contribute to open source over the last several years, I saw this as an opportunity to make my wish a reality – and so I did what any developer would do, created a fork and started to work on a new branch in the hopes I could become a Deno contributor!
As most experienced devs know, stepping into a large and complex codebase isn’t always the easiest thing to do – especially if you’ve never worked with some of the core tooling. With this being my first real exposure to Rust, I was completely unfamiliar with Cargo and how to go about building and testing my changes in an efficient manner… Fortunately, after a handful of web searches, I learned the basics of working in Rust and with Cargo, how to run specific tests by name, and I was off to the races to become a real life Deno contributor.
My commit is simple enough – really just a few lines to add beforeunload and onbeforeunload to the type definition for Deno window, and some updated integration tests to ensure everything is working as expected – you can see the pull request / merge here. While a small contribution by pretty much all standards of measurement, it felt good to see an issue, fix the issue and contribute that fix back to the community – and I hope to be doing more of this in the near future.
So, what’s next? Well, I guess I can actually begin with what I set out to do – learn Deno (rather than Deno’s codebase) and start playing with Fresh! 😁
Today I wanted to make a quick post about a framework/toolset that I’ve become increasingly fond of – NestJS. For those not in the know, NestJS enables developers to write Express APIs (and more) in a very Angular-ish way, including coding in TypeScript.
My adventures into NestJS began, as one could logically assume, with a need for a new API. Having been deeply submerged in Angular-land for several years now, NestJS looked like it was at least worth a peek – and after a peek, we decided it was a perfect fit and so we adopted it.
High-level, we needed an API to essentially wrap some node, npm and Angular CLI processes so that they could be interfaced with by clients via REST. All in all, the API writing process was very straight forward – a controller exposing our business concepts, which performed various node, npm, and Angular CLI operations via dedicated service implementations.
All in all, the writing experience was very pleasant with NestJS – but as often happens with enterprise projects, the target appeared to be moving pretty late in the game as requirements imposed by external players changed.
“Okay. Great. So now we have this REST API, but we’ve since decided that a CLI would be a better fit. Oh, and we needed it yesterday…”
If you’ve ever been a developer in a large organization, you know this sort of thing happens far more often than you’d generally prefer – but it’s life. Things change – lots of moving parts, lots of cooks in the kitchen, etc.
Behind schedule and over budget due to things that were outside of my control, I found myself considering a frantic rewrite of the API. Logically, my mind quickly moved to ‘how much of the API codebase can we leverage in our CLI’, as I opened up the NestJS docs in the hopes that I’d find my magical answer.
“There are several ways of mounting the Nest application. You can create either a web app, microservice or just a Nest application context. Nest context is a wrapper around the Nest container, which holds all instantiated classes. We can grab an existing instance from within any imported module directly using application object. Hence, you can take advantage of the Nest framework everywhere, including CRON jobs and even build a CLI on top of it.”
Perfect – this sounds to be just what the doctor ordered.
Having played with NestJS quite a bit, and being familiar with the transpilation process, I knew I’d essentially get a one-to-one output of my TS implementations in JS. Not wanting to change my API in a way that detracted from using the codebase as a REST API, I instead opted to add another entry point – adding ‘main.cli.ts’ alongside of the NestJS generated main.ts, in which I added my CLI specific logic.
Fortunately, having coded my API with abstractions / separation of concerns the best that I knew how, I had domain specific implementations wrapped in services rather than directly in controllers – this made my CLI experiment a dream rather than a nightmare. With just a few lines of new code in my main.cli, I was able to invoke my service logic from the command line – passing arguments at the CLI rather than properties in a POST body.
> node dist\main.cli.js --id 1
BOOM! DONE!
I honestly found myself blown away by the simplicity of this undertaking. Anxiously considering more or less a full rewrite initially, I found myself empowered by NestJS to fundamentally change my program, additively, in a matter of minutes – rather than the hours or days it would have required to do a full rewrite. With a dozen-or-so lines of new code, I now not only have a fully functional REST API, but I also have a CLI capable of doing the same things as the API.
I know. I know. I’m a bit late to the game – and this was long overdue…
For a few years now, I’ve been fully submerged in the world of Enterprise Angular development – which has unfortunately led to me falling behind on some technologies, such as Docker. While I’ve been aware of LXCs for many, many years now, I’d not gotten past 101 setup tutorials for Docker to date – which changes today.
This post details my initial journey with running my first Docker container based Node.js application under Windows 10 – as well as the challenges encountered with live reload via nodemon during the journey, and how I got everything working well enough in the end.
As is often the case, I went looking for a recent basic getting started writeup, which led me to Dinushanka Ramawickrama’s “Let’s Dockerize a Nodejs Express API“. Being a huge fan of Node.js, often choosing it as my stack of preference, this seemed like a great place to start – taking a Node Express API and shoving it into a container using Docker.
All in all, I have to say that Dinushanka’s write up is pretty good – short, to the point, easy to follow, and accurate. It wasn’t until getting the last section, titled “Dynamically Change the Contents of the Running Container using Nodemon.”, that I ran into problems – for the life of me, I could not get live reload via nodemon to work as expected. Docker would output log messages seemingly indicating that all was well, but when I’d make changes to my server they weren’t syncing in my Docker container.
nodemon reporting for duty – but the duty never shows
As I often do in situations like this, I turned to the comments – assuming that someone else had already experienced my pain and provided me a nicely packaged solution. Nope – not this time. So I went searching, which led me to a relatively recent issue on nodemon’sgithub repo: https://github.com/remy/nodemon/issues/1447 . As suggested by a commenter, I checked out “Application isn’t restarting” in the nodemon readme – https://github.com/remy/nodemon#application-isnt-restarting . Going for the low hanging fruit approach, I updated my package.json’s dev script to include the Legacy Watch flag:
Now, all that was left was to rebuild my image and rerun it:
> docker-compose down
> docker-compose build
> docker-compose up
With the above in place, all was well in the world – containerized live reloading node development. AIN’T LIFE GRAND?!
Long story short, essentially the mechanisms leveraged on Linux systems to detect filesystem changes aren’t available in Windows – and so live reload doesn’t work out of the box. Fortunately, nodemon’s Legacy Watch uses a different (though more costly) polling mechanism to detect changes – which works fine for our purposes of ‘getting started’. Note: this is actually a known issue, as you can see in the Docker official docs: https://docs.docker.com/docker-for-windows/troubleshoot/#inotify-on-shared-drives-does-not-work
It’s worth mentioning that some folks have reported this issue when developing on host Linux systems, which is believed to be related to inotify-tools not being present in the OS image used to create your container. In these cases, your nodemon woes may be solved by simply updating your Dockerfile with an additional run statement to install the package using the container OS’ package manager. See here: https://stackoverflow.com/questions/42445288/enabling-webpack-hot-reload-in-a-docker-application/46804953#46804953